
Install Guide
How to Install a 3-Inch Lift Kit on a 5th Gen Toyota 4Runner (2010-2024)
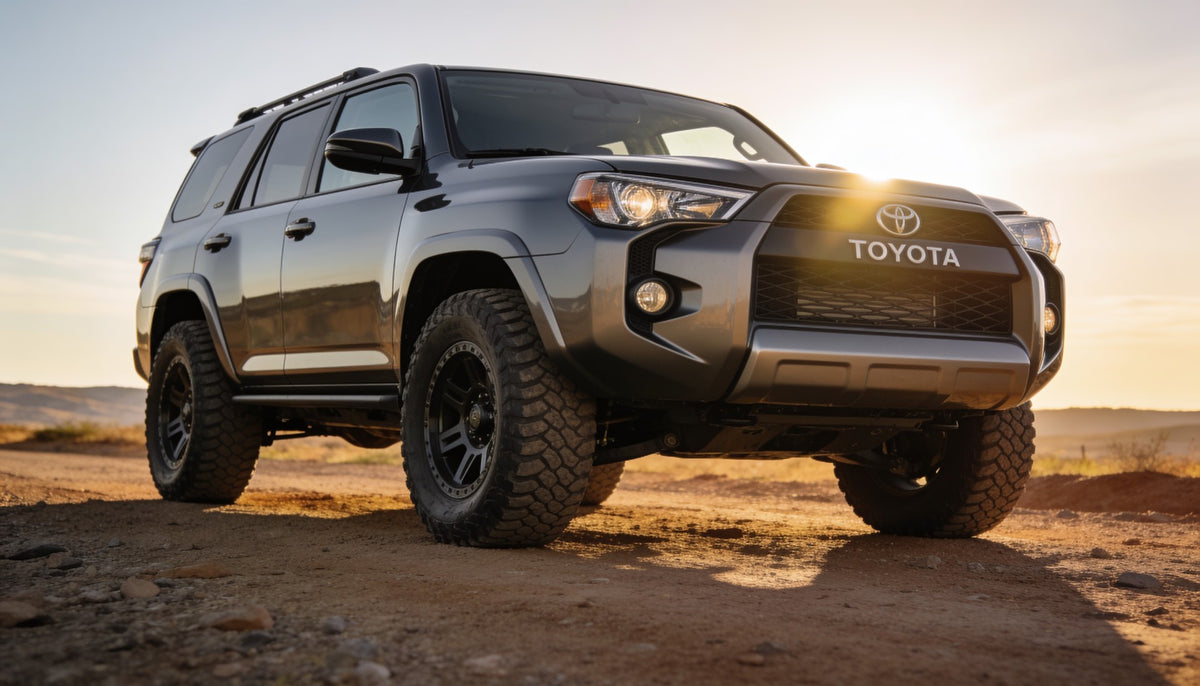
High Road Suspension recommends a certified technician install this system. In addition to these instructions, professional knowledge of disassembly and reassembly procedures, as well as post-installation checks, must be known.
Suggested Tools
- Floor jack
- Jack stands
- Wheel chocks
- Mini sledgehammer
- Pry bar
- Cotter pin removal tool
- Needle nose pliers
- Torque wrench
- Socket extension
- 12mm socket
- 14mm socket
- 17mm standard wrench
- 19mm socket
- 19mm standard wrench
- 19mm extended wrench
- 19mm ratcheting wrench
- 21mm deep socket
Front Installation
- Set the parking brake.
- Jack up the front of the vehicle and support it with jack stands, so that the front wheels are off the ground.
- Chock the rear tires to prevent rolling.
- Remove the front tires and wheels using a 21mm deep well socket.
- Using a 12mm socket, remove the skid plate from the vehicle.
- Remove the cotter pin from the outer tie rod end on the steering linkage. A cotter pin removal tool and some needle nose pliers are useful.
- Using a 19mm socket and wrench, remove the nut on the outer tie rod end.
- The tie rod end uses a tapered bolt that wedges into the knuckle. Use a mini sledgehammer to strike the side of the cast knuckle and allow the tie rod end to separate from the knuckle.
- Remove the linkage from the knuckle. Push the linkage forward to make room for installation. Retain the factory nuts.
- Using a 17mm wrench, remove the sway bar bolts, allowing the sway bar to drop. Sometimes it is useful to do both sides of the sway bar at the same time. Retain the factory hardware.
- Remove the sway bar link.
- To allow the strut to be removed, remove the ABS bracket from the knuckle using a 12mm socket. Retain the factory hardware for reuse.
- Place a jack under the lower control arms and raise the lower arms up slightly to relieve pressure on the top strut nuts.
- Using a 14mm socket, remove the strut nuts on the upper coil bucket that hold the assembly in place.
- Remove the ABS bracket from the knuckle.
- Using a 19mm socket, remove the nut from the ball joint on the upper control arm.
- Like the tie rod end, the upper arm ball joint bolt is also tapered. Use a mini sledgehammer to hit the knuckle and allow the ball joint to separate from the upper control arm. Remove the nut on the upper ball joint.
- Lower the jack. Do not allow the knuckle to pull out far enough that it pulls the CV shaft out of the differential or overextends the brake line.
- Using an extension with a 19mm socket affixed to it, along with a wrench, remove the strut bolt from the lower control arm and remove the strut assembly.
- Retain the factory lower hardware for reassembly. Note the direction of the bolt for reassembly.
- Remove the factory struts.
- Using 19mm wrenches, remove the upper control arm bolt, nut, and washers. A long wrench helps to break the nuts loose, and a ratcheting wrench will help to remove the nuts quickly in the tight space.
- You may have to use a pry bar to manipulate the pinch weld in order to remove the upper control arm bolt.
- Remove the upper control arm bolts.
- Determine the correct upper control arm for the side of the vehicle you are working on.
- Install the supplied upper control arm using the factory hardware, making sure to install the bolt from the front of the vehicle. Torque the nuts using a 19mm socket and wrench.
- Install the strut assembly into the upper coil bucket.
- Attach the strut studs with nuts, or the supplied bolts for coilovers.
- Lift the jack to bring the lower arm up to the lower strut or coilover eyelet.
- Using the original hardware and a 19mm socket, torque the lower eyelet bolt and nut.
- Use the jack to lift the entire assembly up to the new upper control arm, then tighten the upper ball joint nut.
- Reinstall the tie rod end of the steering linkage into the knuckle using the original factory nut, then install the supplied new cotter pin.
- Reattach the ABS wire bracket and wire to the new upper control arm.
- Repeat steps 1 through 33 on the opposite side of the vehicle.
- Using a 17mm wrench, reinstall the sway bar links using the factory hardware.
- Install the skid plate using the factory hardware and a 12mm socket.
- Install the wheels and tires using a 21mm socket.
- Jack up the vehicle and remove the jack stands.
- Lower the vehicle down onto the ground.
- With the vehicle on the ground, torque the lug nuts to 85 lb.
Rear Installation
- Jack up the rear of the vehicle and support it with jack stands, so that the rear tires are off the ground.
- Chock the front tires to prevent rolling.
- Using a 21mm deep socket, remove the rear tires and wheels.
- Using a 17mm socket and wrench, remove the rear lower shock nuts. Retain the lower shock hardware for reuse.
- Place the jack under the rear axle and lift to remove pressure on the upper shock nut. Remove the upper shock nut.
- Lower the jack.
- Remove the lower shock bolt, then remove the factory rear shock.
- Using a 17mm socket or wrench, disconnect the sway bar links.
- Using a 12mm wrench, remove the bolt holding the brake line bracket to the frame on the driver's side, and the ABS wire on the passenger's side.
- Slowly lower the axle and remove the factory coil spring.
- Install the new coil springs into the factory coil bucket.
- Make sure the lower coil is positioned correctly in the lower spring seat.
- Using a 12mm wrench, reinstall the brake line bracket on the driver's side, and the ABS bracket on the passenger's side.
- Using a 17mm wrench, reinstall the sway bar links using the factory hardware.
- Reuse the lower shock bolt and nut to affix the lower eyelet of the new shock absorber.
- Use the floor jack to raise the axle and bring the shock up to the upper mount.
- Using new hardware for the top and factory hardware for the lower mount, torque the upper shock mount nut to 18 ft lb and the lower shock bolt to 72 ft lb.
- Repeat the process on the opposite side.
- Reinstall the tires and wheels using a 21mm socket.
- Jack up the rear of the vehicle and remove the jack stands.
- Lower the vehicle to the ground.
- Re-torque the wheel lug nuts to 85 lb.
Post-Installation
- This vehicle must have a front and rear-end alignment after installation of the suspension kit.
- Check and recheck all fasteners for proper torque.
- Check to ensure there is adequate clearance between all rotating, mobile, fixed, and heated members.
- Check the clearance between the upper control arm and the sidewall of the tire. Check the steering for interference and proper working order. Test the brake system.
- Perform a steering sweep. Cycle the steering from full turn to full turn to check for clearance. Failure to perform inspections may result in component failure.
- Re-torque all fasteners after 500 miles. Visually inspect components and re-torque fasteners during routine vehicle service.
- Adjust the headlights to the proper settings given the increased vehicle height.
Maintenance Information
It is the ultimate buyer's responsibility to have all bolts and nuts checked for tightness after the first 500 miles, and then every 1000 miles. The wheel alignment, steering system, suspension, and driveline systems must be inspected by a qualified professional mechanic at least every 3000 miles.
Shop suspension and lift components for the 2010-2024 Toyota 4Runner.
Frequently Asked Questions
Does a 3-inch lift on a 5th gen 4Runner need an alignment?
Yes. This vehicle must have a front and rear-end alignment after the suspension kit is installed. Lifting changes the suspension geometry, so an alignment is required to bring everything back into specification and protect your tires and handling.
Do I need new upper control arms for this lift?
Yes, this kit includes supplied upper control arms. During the front install you remove the factory upper control arm and install the supplied one, making sure to run the bolt in from the front of the vehicle, then torque the hardware with a 19mm socket and wrench.
What are the torque specs for this 4Runner lift?
Torque the lug nuts to 85 lb. On the rear, torque the upper shock mount nut to 18 ft lb and the lower shock bolt to 72 ft lb. Re-torque all fasteners after the first 500 miles, and check them again during routine service.
Can I install this lift kit myself?
High Road Suspension recommends a certified technician install this system. Beyond the steps here, you need professional knowledge of disassembly and reassembly and the post-install checks, including a steering sweep from full turn to full turn to confirm clearance. Skipping those inspections can lead to component failure.
What should I check after installing the lift?
Recheck all fasteners for torque, confirm clearance between all rotating, fixed, and heated members, check the gap between the upper control arm and the tire sidewall, test the steering and brakes, and perform a full steering sweep. Get the alignment done, then re-torque everything again at 500 miles.
More Install Guides
Dobinsons 2.2" IMS vs. Bilstein 5100: Which Is Best for Your Vehicle?
Dobinsons 2.2 IMS and Bilstein 5100 front struts compared on body size, adjustability, spring options, weight support, and cost, so you c...
Read the guide ›
The Best Way to Level a 2022+ Nissan Frontier
Spacer, Bilstein 5100, or adjustable coilover? How to level a 2022+ Nissan Frontier the right way, accounting for factory rake and side-t...
Read the guide ›
Long Travel Suspension Explained: What It Is, What It Costs, and Whether It's Worth It
Long travel suspension is not just longer shocks. Here is what a real build involves, why it can top $25,000, the trade-offs, and who it ...
Read the guide ›